Hi, Developers!
Hope you all are doing well. Today I am going to tell you how to install the Microsoft Visual Studio 2019 on your machine. First let me tell about VS 2019, Visual Studio is an IDE which stands for Integrated Development Environment and IDE is used to create an environment for developers or we can call it as code editor as Eclipse and Visual Studio Code, these all are an IDE. We are going to install the latest version of Visual Studio; it is developed by Microsoft.
Let’s Start…
Follow the below instructions to get installed Visual Studio 2019:
- Open your browser and search for Visual Studio 2019 on Google as shown in below snapshot.
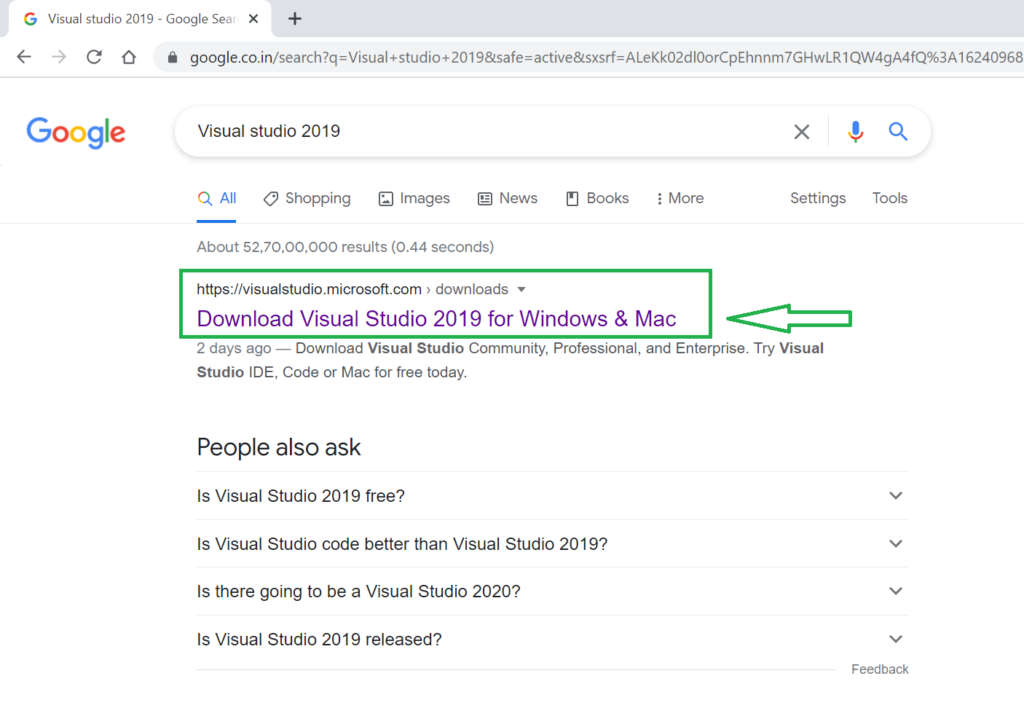
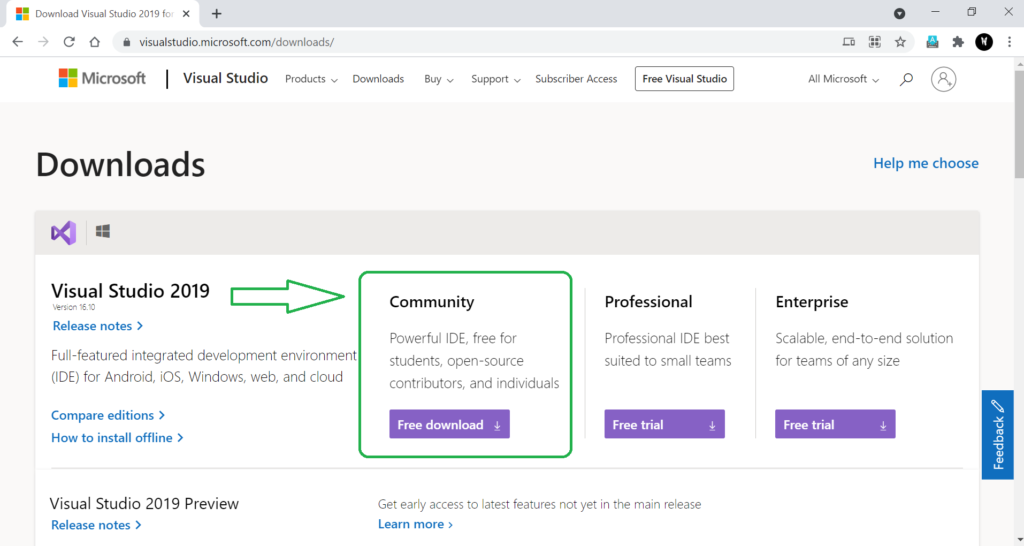
- Now click on the first link as you see in web search result above. You will redirect to official web page of Visual studio. You can visit the URL https://visualstudio.microsoft.com/downloads/ directly. As you can see there are mainly three editions of Visual Studio i.e. Community, Professional and Enterprise. Mostly developers install the Community edition, so we will install the same as shown in below snapshot.
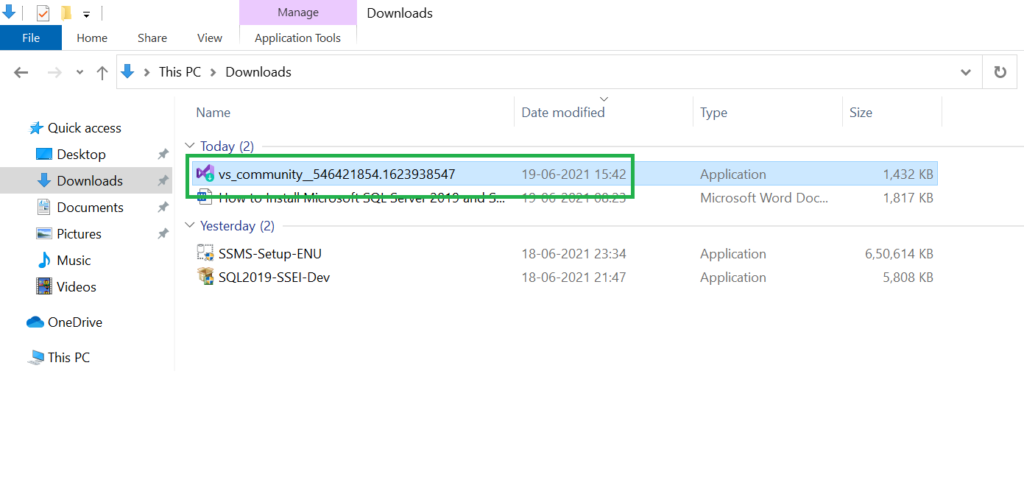
- Let’s click on the free download button. Once you clicked, it will automatically start the downloading as you can see in below snapshot. You can find the exe file in your default download location.

You can see my download file below.
- Let’s right click on downloaded file and Run as administrator as below shown in snapshot.

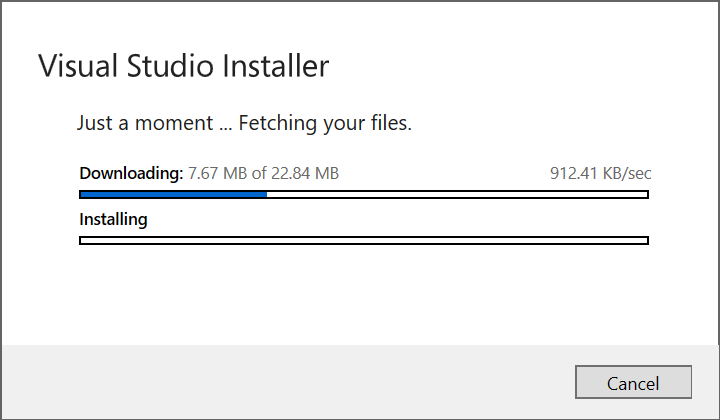
- Once you execute the file you will see the below popup as Visual Studio Installer. Let’s click on Continue button.

- After clicking on Continue button it will start to download the installer file.
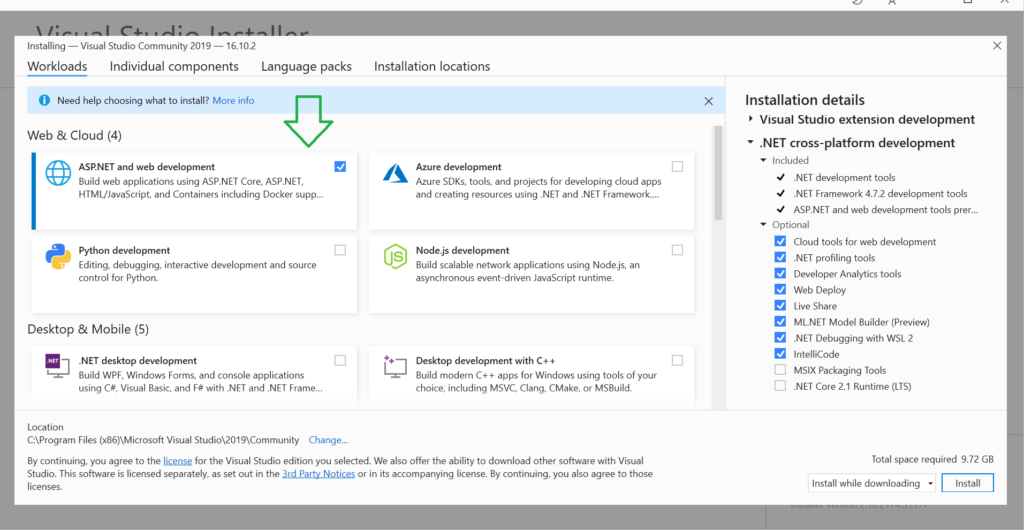
- Once it’s completed you will see the below window, so let’s select the workloads according to your needs and requirements. As I have selected the basic workload that I want to build the Web applications using ASP.NET Core and ASP.NET MVC framework and programming language is C#

How to Install Microsoft SQL Server 2019 and SSMS
- As you can see there is need of approx. 10 GB of space. Make sure before installing it. You must have enough free space in your computer hard drive. It will install in your C:\ drive. You can choose your location, but I would suggest leaving it as default location.
- Once you clicked on Install button, it will show the below window.

- Now let it be finished the downloading and installing the required files. It depends on your internet speed.
- Wow, Congratulations! Downloading and installing both have been completed as you can see the below snapshot. I would highly recommend you restart the machine.
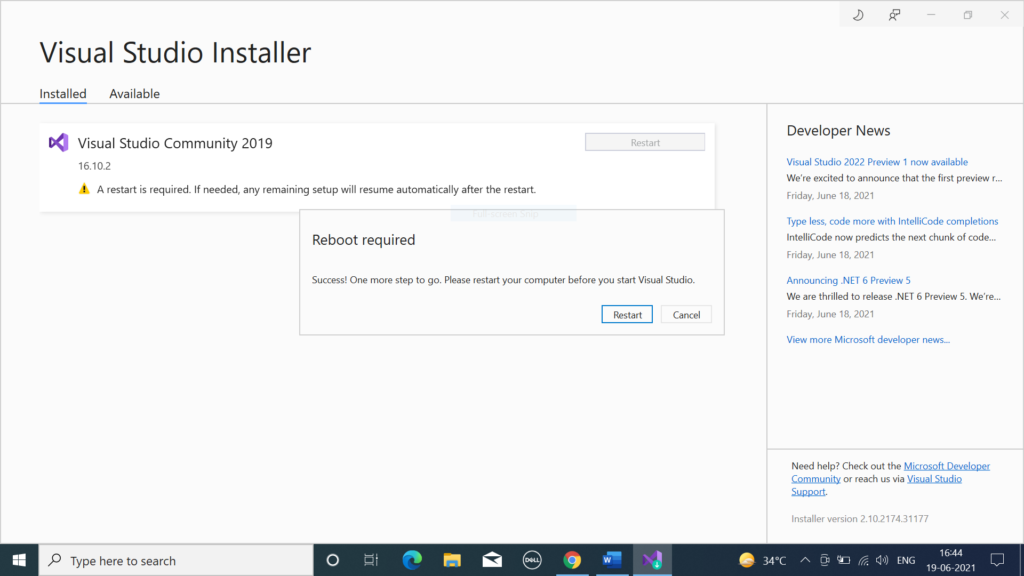
As you can see it is asking to restart your computer, so let’s restart it.
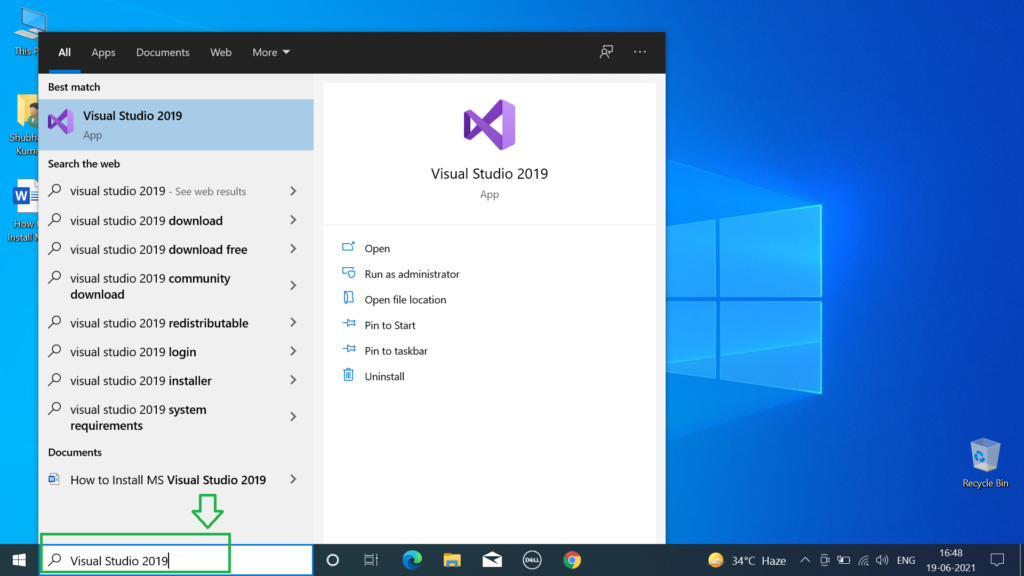
- I have restarted my computer. Now it’s time to check weather we can see our visual studio 2019 is installed or not. We can search for “Visual Studio 2019” in window search bar as shown in below snapshot.
- Now click on Run as administrator. You will see a pop-up as shown in below.

- Now click on “Not now, maybe later” and you will see new window as shown in below snapshot to choose a theme for your visual studio 2019. You can change the theme later also.

- In my case, I like Blue theme, so I selected blue and clicked Start Visual Studio button. It takes few minutes to open start page of Visual Studio 2019 as shown in below snapshot.

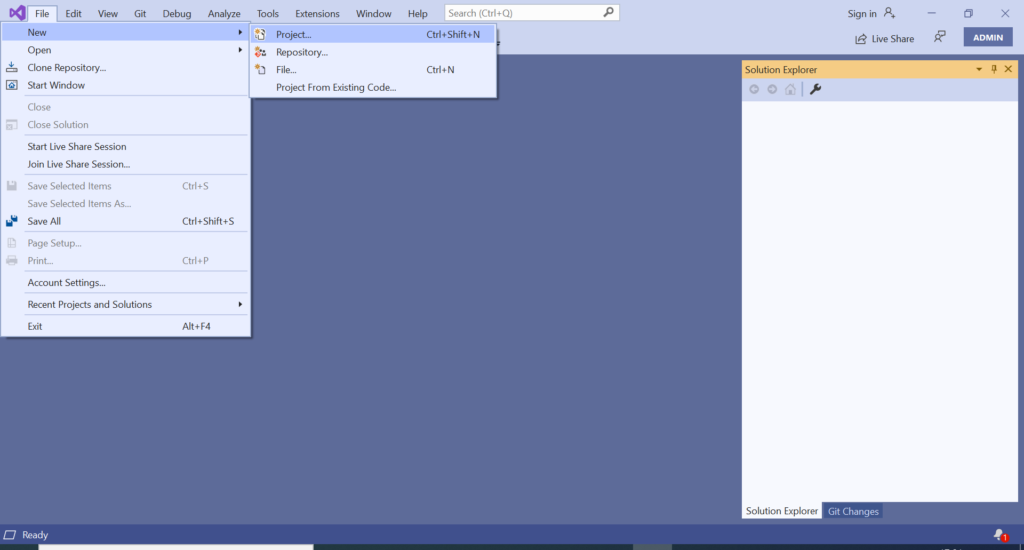
- Now click on “Continue without code” and it will open a new window as shown in below snapshot.
Wow, Cool! 😊
Successfully! We have installed our Visual Studio 2019
You are ready to build your applications… Happy Coding 😊!
Please comment if you have any issue at any steps.