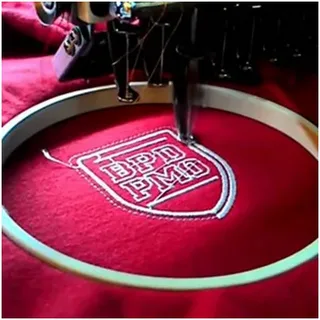
Understanding The Importance Of Adjusting Embroidery Designs
When using digitized embroidery designs, you must resize them. This is key to making them fit the garment or material you are using. Professional or hobbyist, you likely need to resize machine embroidery designs for your projects. However, resizing is not as simple as it seems. It’s not just about resizing the design. You must avoid distorting the artwork and stitching quality.

Why Resizing Matters
Imagine embroidering a design meant for a small handkerchief on a large blanket. The size guide ensures your design looks good on your fabric. Incorrectly adjusting the design size can lead to poor stitch quality, distorted shapes, and even thread breaks. If you’re using custom or any digitized embroidery designs, follow the right size chart and techniques. It will save you from future headaches.
Key Considerations When Adjusting The Size Of An Embroidery Design
- Stitch Density: Every time you change the size of a digital embroidery design, you affect the stitch density. Enlarging a design can make stitches too loose, while shrinking it can cause them to overlap or bunch up. Adjusting the stitch count to maintain quality is essential.
- Type of Fabric: Different fabrics require different densities of stitches. A design suitable for lightweight fabric may need adjustments when applied to a thicker material.
- Thread Type and Needle Size: Changing the design size may also mean changing the type of thread or needle size. Always ensure that your tools are compatible with the size of the digitize embroidery designs you are working with.
Step-By-Step Process For Resizing Your Embroidery Design
1. Check The Original Design File
Before making any changes, check the original digitized embroidery file. Some designs may already have limitations on how much they can be resized without affecting the stitch quality.
2. Use Embroidery Software For Adjustments
The easiest and most accurate way to adjust the size of digital machine embroidery designs is by using embroidery software. Most embroidery software can resize designs and adjust the stitch count to match. This ensures that the stitch density remains consistent and prevents distortion of the design.
Here’s how to resize using most common embroidery software:
- Open the design file in your software.
- Select the design.
- Use the resizing tool to adjust the design proportionally.
- Let the software automatically recalculate the stitch count based on the new size.
3. Test Stitch On Scrap Fabric
Before applying the resized design to your final project, test stitch it on a piece of scrap fabric that closely resembles the fabric you’ll be using. This will give you a chance to see how the resized design stitches out and if any adjustments are still needed.
Common Mistakes When Adjusting Embroidery Designs
1. Ignoring The Stitch Density
One of the most common mistakes is resizing a design without considering the stitch density. When you increase the size of a design, but don’t adjust the stitch count, the stitches can become too loose. Conversely, shrinking a design without adjusting the density can cause stitches to pile up. This can lead to puckering or even fabric damage.
2. Not Following An Embroidery Size Chart
Each fabric and material type will have an embroidery size chart. It will give the best sizing recommendations. Using this guide ensures your design isn’t too big or small for your project. Always refer to these guides when resizing custom digitized embroidery designs to ensure the best results.
3. Not Accounting For Fabric Stretch
When working with fabrics that have a lot of stretch, the design can easily distort. Ensure that when adjusting the size of digitizing machine embroidery designs, you account for the amount of stretch in the fabric.
Table: Embroidery Design Resizing Considerations
| Factor | Enlarging the Design | Shrinking the Design |
| Stitch Density | Stitches may become too loose | Stitches may overlap or bunch up |
| Fabric Type | Thicker fabric may need more density | Lightweight fabrics may bunch |
| Thread Type | May need a thicker thread | May need a finer thread |
| Needle Size | Larger needle for larger designs | Smaller needle for smaller designs |
| Stabilizer | May need stronger stabilizer | Lighter stabilizer may be sufficient |
| Test Stitching | Always recommended | Always recommended |
Resizing Tips For Custom Digitized Embroidery Designs
If you’re working with custom digitized embroidery designs, the process of resizing can be even more specific. Each design is often made for a specific size. So, drastically resizing a custom design can cause issues with thread tension and stitch accuracy.
- Work with your designer: If possible, talk to the designer of the custom embroidery designs. Understand the limits of resizing them.
- Use advanced embroidery software: Professional-grade programs are best for resizing machine embroidery designs. They maintain the original design’s integrity while resizing.
Maintaining Quality After Resizing
Ensuring high quality after resizing is vital to the overall look of your digital embroidery designs. One key approach is to never over-resize a design. A good rule of thumb is to stay within 10-20% of the original size to avoid compromising the design’s integrity.
1. Stick To Proportional Changes
Always make sure that you adjust both the width and height of the design proportionally. Stretching only one axis of the design will distort it, ruining the final look.
2. Mind The Small Details
Digitizing machine embroidery designs can be tricky. Small details, like text, may lose clarity if resized too much. Keep an eye on these details when resizing and consider simplifying them if necessary.
Adjusting Embroidery Designs
Resizing digitized embroidery designs is a critical skill for anyone involved in embroidery. It can be tricky, but when done correctly, it allows you to create beautiful, customized pieces that fit your project perfectly. By using the right tools and following these steps, you can confidently adjust your designs without losing quality.
Also Read More
Are You Making These 8 Mistakes In Your Cleaning Business Listings?
Related: What Are The Symptoms Of Mold Exposure?